Introduction
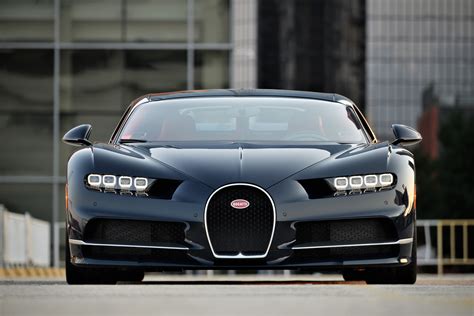
Today, I want to take you behind the scenes of a photoshoot featuring a beautiful Polestar 2 electric vehicle. I usually rely on natural light for my photography, but this time, I decided to switch things up and use a strobe to capture some stunning shots. Join me as I walk you through the process of setting up my camera, shooting the base photo, using the strobe to highlight different elements of the car, and finally, bringing all the images together in post-processing.
Setting Up the Camera
I’m using my trusty a7r4 for this shoot, with specific settings to ensure I capture every detail of the car. Shooting at the height of the mirror on the car is a good rule of thumb, but I decided to go slightly lower for a better angle. With an f-stop of 7.1, a shutter speed of 1/50, and an ISO of 200 (possibly dropping to 100), I’m all set to capture the base photo that will serve as the foundation for the final image.
Using the Strobe
With the strobe in hand, I begin to move around the car, focusing on highlighting its curves and features. Adjusting the power and position of the strobe allows me to capture the different elements of the car in the most attractive way possible. By painting light onto specific areas of the car and taking multiple shots, I lay the groundwork for creating a dynamic and visually appealing final image.
Post-Processing in Lightroom and Photoshop
After the shoot, I bring all the photos into Lightroom for color editing and batch processing. Once the initial edits are done, I export the images and move them into Photoshop for the final compositing stage. By layering each shot on top of the base image and selectively painting in the desired elements, I create a cohesive and detailed composite that showcases the car in the best light.
Retouching and Final Touches
With the composite image ready, it’s time for some retouching and final adjustments. Using a combination of stamp and healing brush tools, I remove any unwanted hotspots created by the strobe and fine-tune the image to perfection. Additional techniques like dodging and burning help enhance the overall look of the photo, resulting in a polished final image that captures the essence of the Polestar 2.
Conclusion
Thank you for joining me on this car photography journey. From setting up the camera and using a strobe to post-processing and final touches, every step plays a crucial role in creating a stunning image. I hope this behind-the-scenes glimpse has inspired you to experiment with different techniques in your own photography projects. Stay tuned for more creative adventures in the world of photography!
Related Questions
1. What inspired you to use a strobe for the Polestar 2 photoshoot?
– I wanted to challenge myself and explore new lighting techniques to enhance the visual appeal of the car.
2. How did you ensure capturing all the details of the car during the shoot?
– By setting specific camera parameters like f-stop, shutter speed, and ISO, I aimed to ensure maximum detail in the photos.
3. Can you explain the process of layering and masking in Photoshop for compositing the images?
– Layering involved stacking multiple photos on top of the base image, while masking allowed me to selectively reveal or hide parts of each layer to create a cohesive final image.
4. What tools did you use for retouching and final adjustments in the post-processing stage?
– I utilized a combination of stamp and healing brush tools for retouching, along with techniques like dodging and burning to enhance the overall look of the photo.
5. How do you add final touches and effects to your images before the final reveal?
– I often use mobile apps like Lens Distortions to add flares and other creative effects, giving the image a unique and polished finish.